Before starting with this article or video, If you want you can go through the Pega release notes on the latest version
Source: https://docs.pega.com/bundle/platform/page/platform/release-notes/platform-release-notes.html
Hi All, recently Pega has launched Pega Platform 24.2. And along with this they have introduced a lot of changes to the product. In this post we will see some of the major changes in Pega 24.2
1. No support for Java 8 & Java 11
Pega platform no longer supports Java 8 & Java 11. To upgrade or install Pega 24.2, you will need Java 17.
2. Removal of embedded Elasticsearch, Kafka & Cassandra:
Pega will no longer provide these third party services. So you will need to externalize these services. For now, Hazlecast will be supported in Pega 24.2, but it will no longer be supported in Pega 25.
3. Auto Generated Insight on Case Type creation.
When you create a new case type, it will create a table based insight for you which can be used as a landing page. It will allow us to show the important case related info more conveniently.
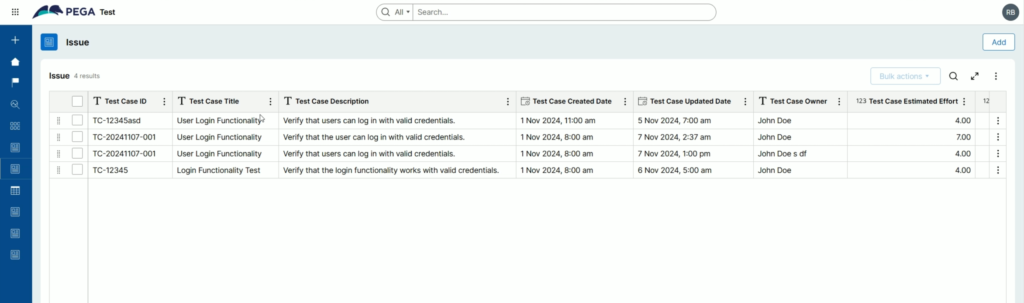
4. CRUD operations in Insights:
Now you can perform the CRUD operations on the Insights. It will allow the end users to alter the data on the go when it’s needed.
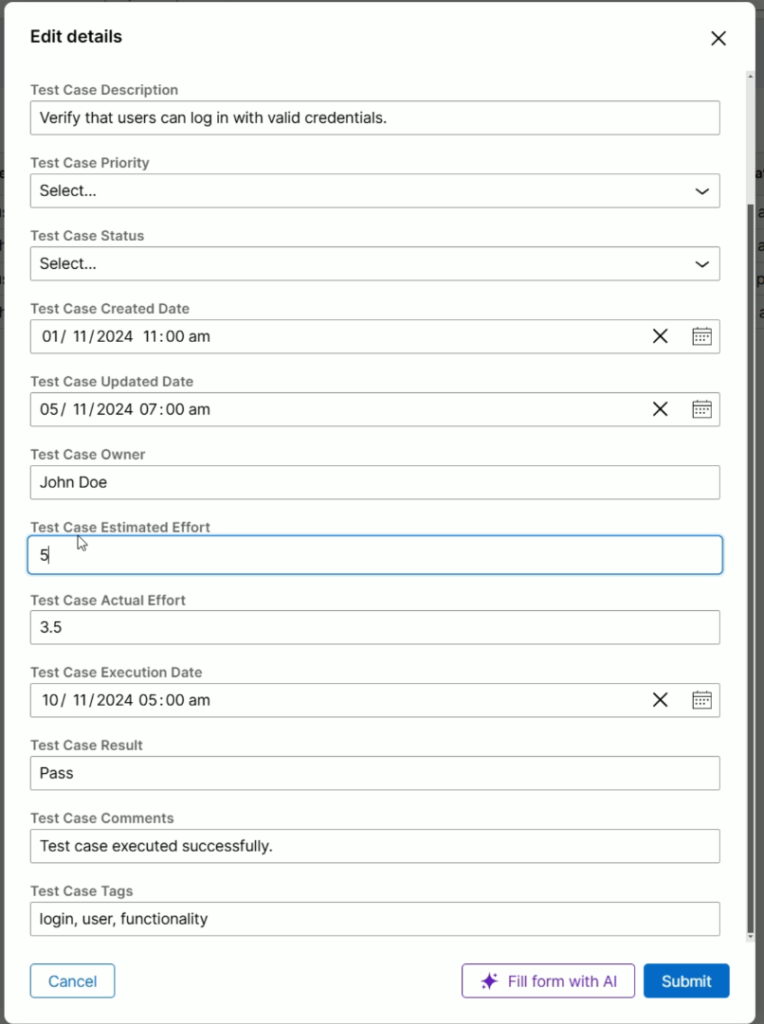
You can simply click on Three vertical dots and click Edit Details, to update the Case data.
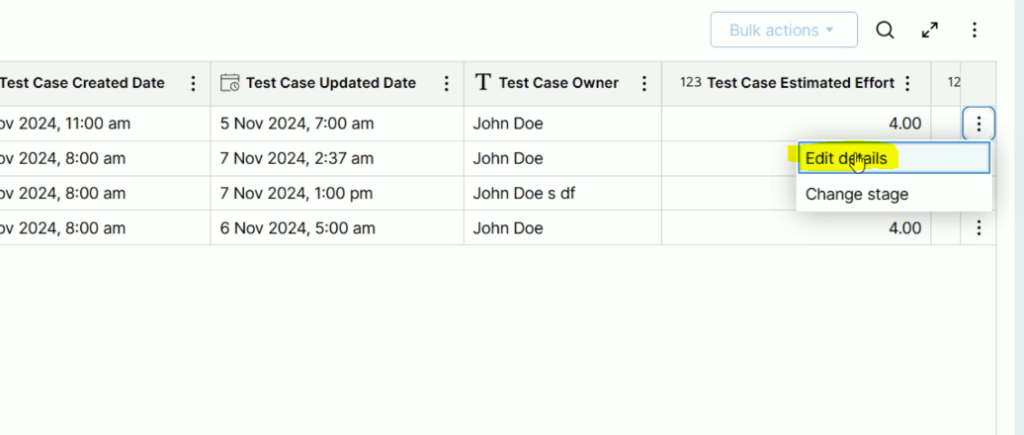
After this, the case will be editable and you can click Submit to save the changes.
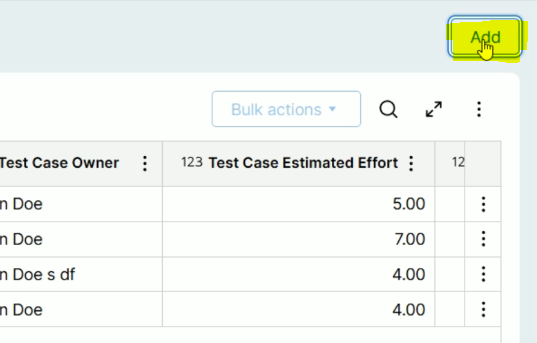
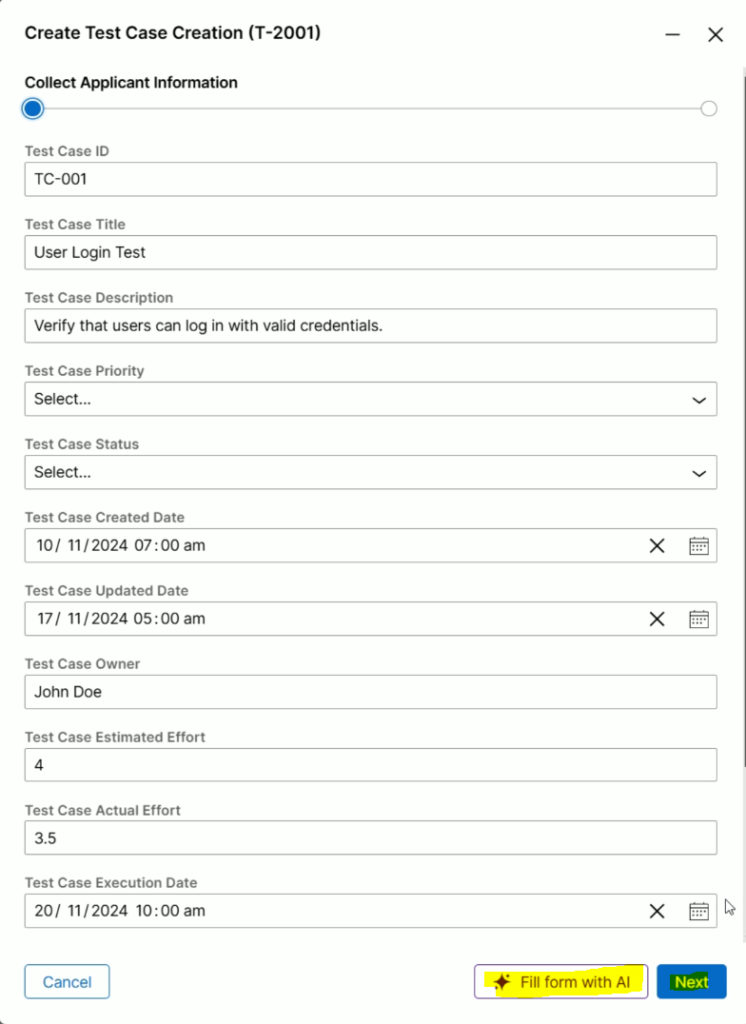
Not only this, but you will get an option to create a new record or care. You just need to click on the Add button like shown below.
You will get the option to input the data for your new case and you can make use of AI to fill the for by simply clicking Fill form with AI and click Next to move the case ahead.
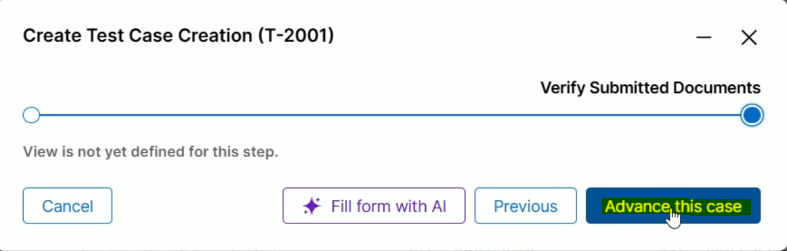
Now click Advance this case
And now, this will open the newly create case for you.
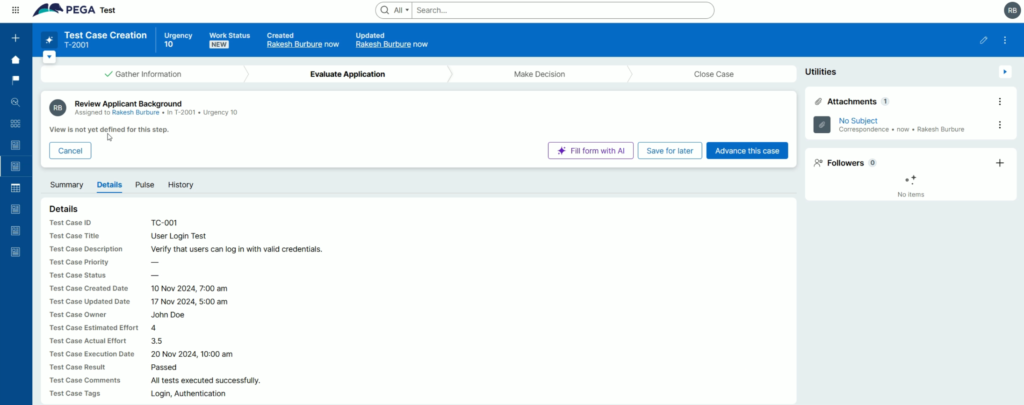
If you go back to the Insight, you will find the new case has been inserted to the table.

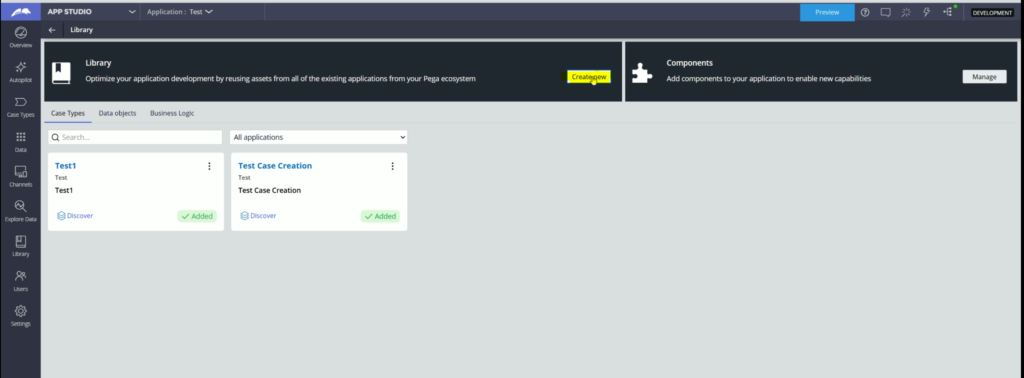
5. Enhancements in the Library
Now, Library supports Correspondence, Processes & User Actions. Also you can manage your rule in Library also. For e.g. Data Transform.
You will get the option to open the Library screen from the LHS panel.
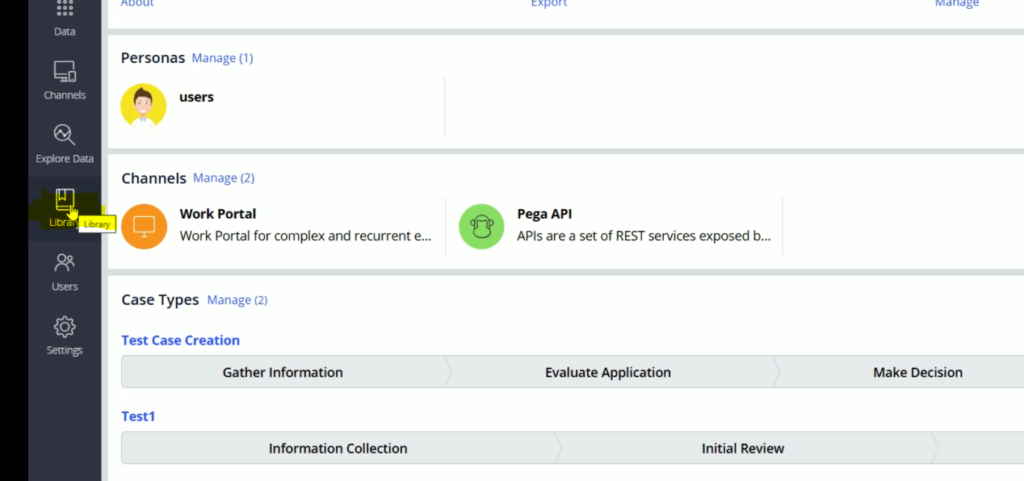
This is the Library home screen. Form here you an check the existing items. You can create a Library item by clicking Create new
At the moment these are the rule types which are available in the Library
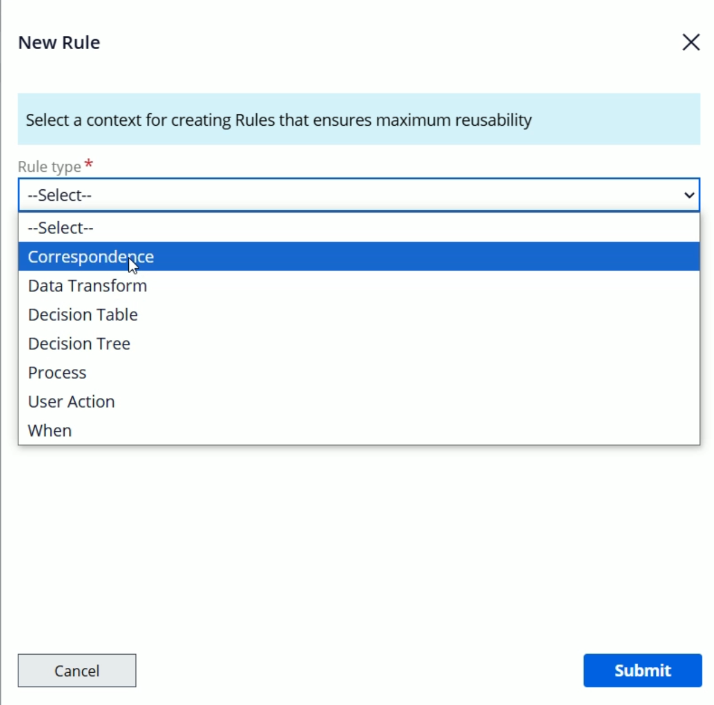
Apart from creating these rules, you can go and update these rules as well. For now, you can cancel this.
If you go to Business Logic page, you will find all the created rules
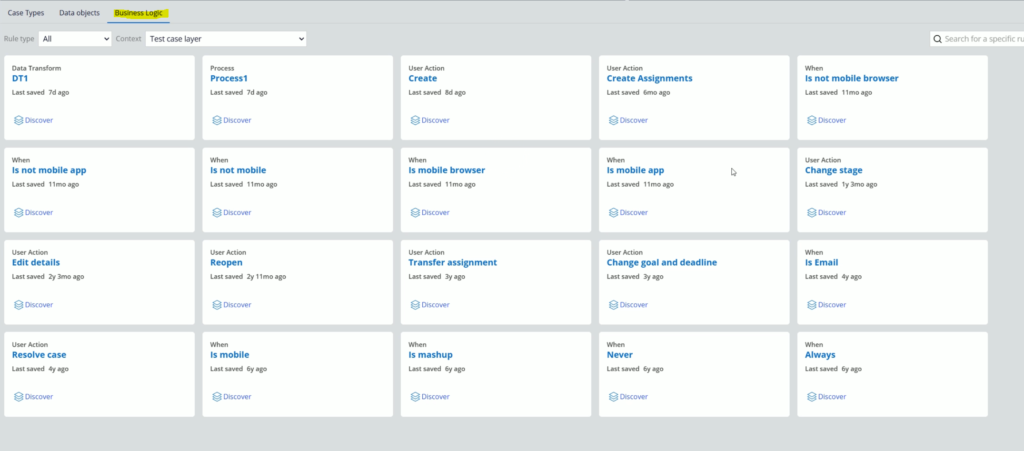
For e.g. Lets open DT1 Data Transform
You can update your rule and simply save the changes. (Note: As, all RSV are locked in my case, there is no Save option)

If you want, you can open the rule in Dev Studio as well. If you do advanced configuration from Dev Studio which are not supported in App studio, then you will need to do future changes in that rule from Dev Studio only.
6. GenAI Rule connect.
If you know, the GenAI functionality works with the help of a connector. Basically, whatever things we request, pega prepares a statement and it will be passed to the GenAI provider and we get the result. Pega parses that result and does the respective actions like creating a casetype, adding stages & steps this and many more.
GenAI can be unit tested.
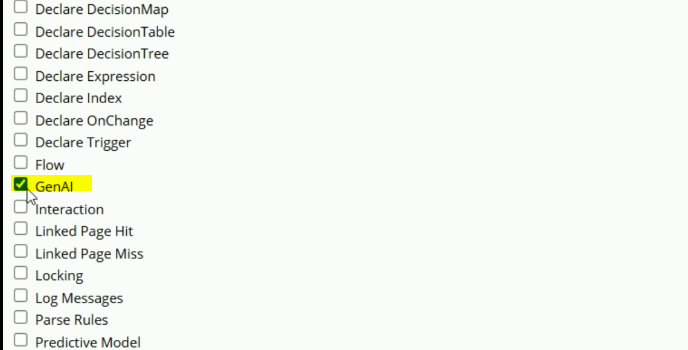
You can debug it. If you go to Tracer settings, you will get this option.
Now, open the Tracer and go to settings.. Here you will find a new option GenAI. It will allow us to trace the GenAI & Coach related rules
Please stay tuned for the latest updates.
7. Constellation PAL tool.
You can launch the User Portal or click Preview to open the User Portal. Now click on your Operator Icon from the top right corner and click PAL Profiler option.
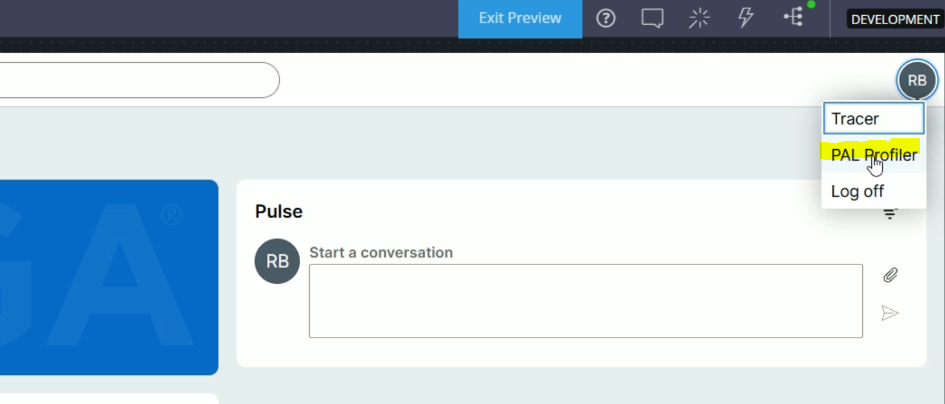
It will open the PAL tool in a separate tab.

You can perform some action and click Add reading to take the PAL readings.

8. Workspaces.
Workspace gives you the flexibility to do the changes in the App Studio without affecting developers work. It allows you to do your experiments and the changes will be available to you only until you move the changes to a separate branch.
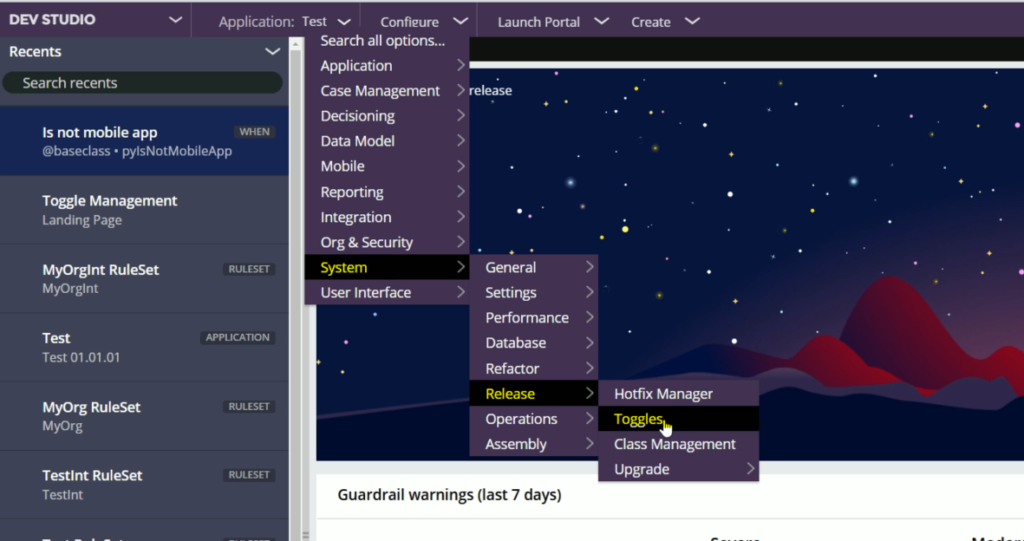
So before you start with this, make sure you lock all the RuleSets, otherwise you will not be able to progress with it. Also, you will need to enable this toggle EnableWorkspace to move ahead with Workspaces. From Dev Studio, go to System > Release > Toggles
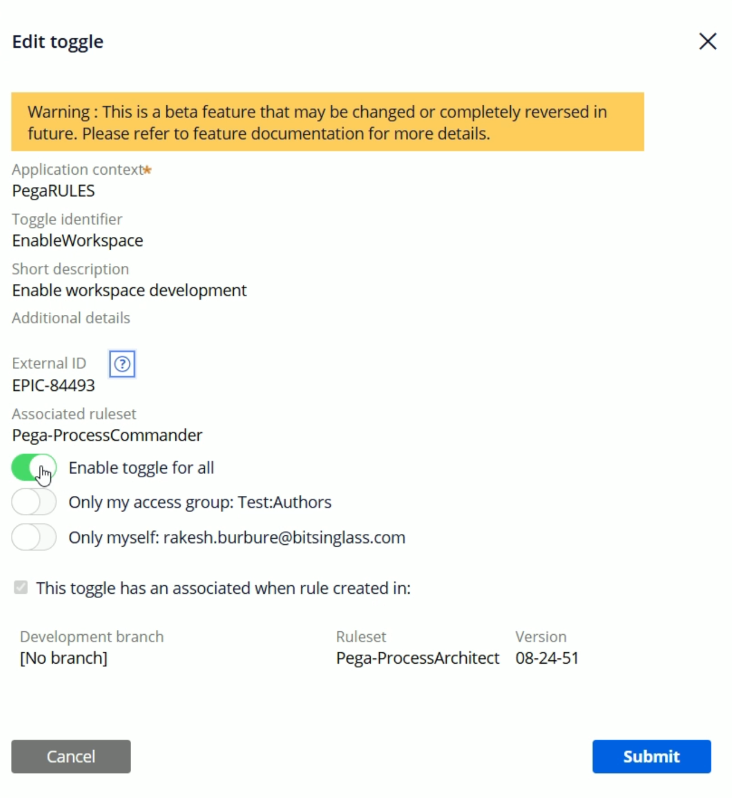
Search for EnableWorkspace and edit this toggle

Enable “Enable toggle for all” and click submit
Now, go back to App Studio and click on the Workspace icon to launch the Workspace panel.
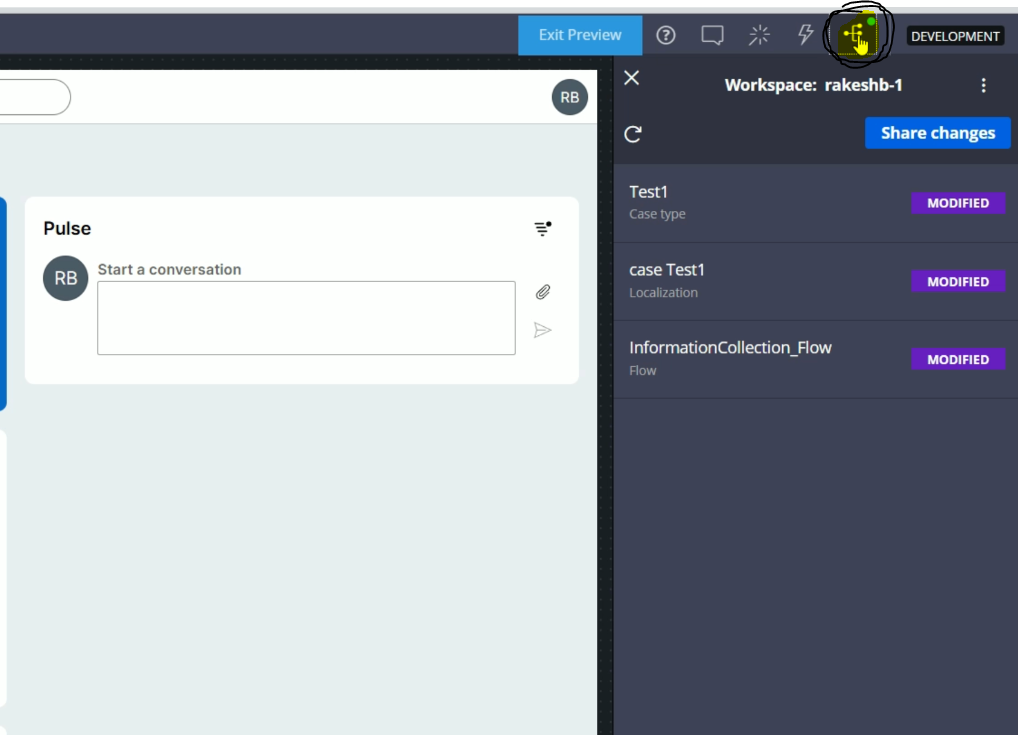
In your case it will blank as there will not be any changes done from your side. I already did some changes earlier, so its visible in my workspace.
Now, for testing purpose, lets open the Test1 Case type and add a simple step to second stage and save the case. As shown in the below screen, Add step E and click Save
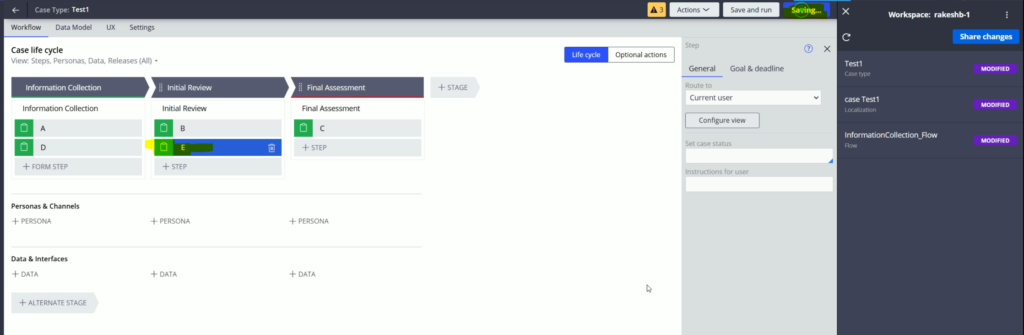
Now, click Refresh workspace icon and you will find the Initial Review has been included in your workspace.
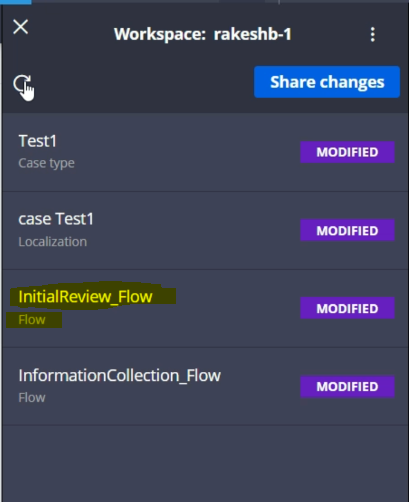
And once you fill you are ready with your changes and wanted to share it with everyone, you can go and click Share changes

It will give a screen where you can select your branch in which you wish to move your changes. Also, you can create a new branch in case you don’t have any.
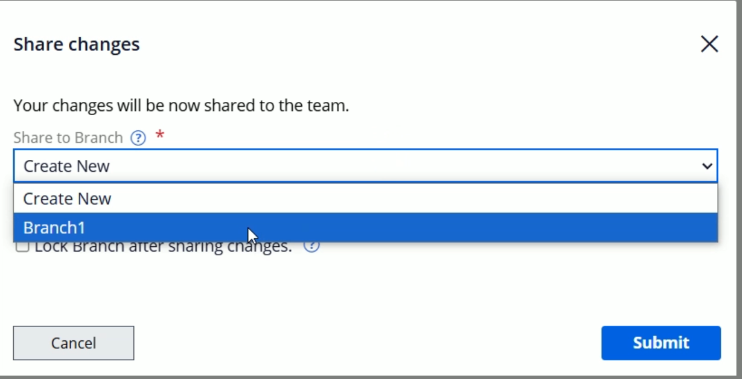
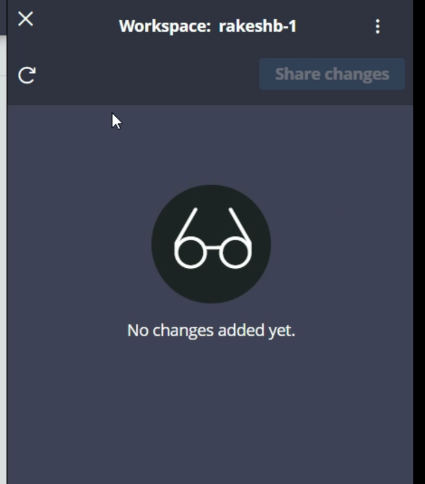
Select the branch and click Submit. The changes will get moved to branch and workspace will go blank.
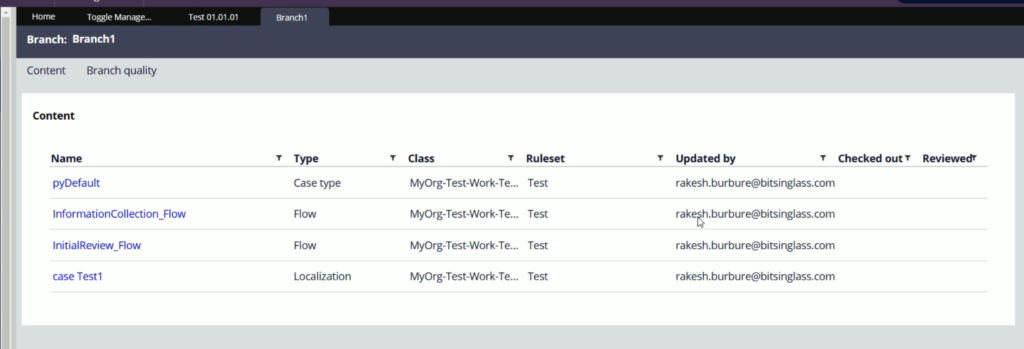
Now, go to Dev Studio > Open Application Definition > Open the branch.
You should see your changes from workspace are successfully moved to branch.
9. Gen AI Blueprint
Go to App Studio > Overview. In the Pega GenAI Blueprint section you should see one option Export as Blueprint.
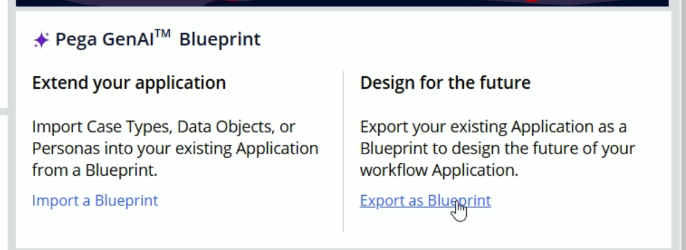
It means, lets say, you have already created an application and wanted to have its blueprint and share it with your team mates, this is the option you can choose.
There is going to be a separate blog on the Pega GenAI Blueprint
10. Other:
Apart from there are many other improvements or addition made to Pega Platform within 24.2 and they are as below.
New Content Security Policy for Constellation UI
Form Improvements: Dynamic labels
Hierarchical Forms: Used to fill big amount of data
Constellation Search & Select
Data Display: Select columns, full screen view
Map & Location widget
Aggregations in table like sum, average, etc.
Toast Message to follow/ open newly created object/case
Source: https://docs.pega.com/bundle/platform/page/platform/release-notes/platform-release-notes.html