Creating an application is the starting point of the application development journey. But as a part of modular application development, its necessary to create different applications for different purposes.
This makes sure that the complete application development has happened in modular approach.
With modular approach, we have different application for different purposes. And we can use the applications as Built on application wherever required. With approach, we can increase the reusability.
One more modular approach suggests creating separate application for all case types. And in the main applications, all those case type related applications can be used as Build on applications (multiple built on applications).
Even in LSA Part 2 exam, Pega expects you to follow this kind of modular apporach.
Here, in this article, we are going to create the separate Enterprise application.
You will find enterprise application in almost all the modern application. It is managed by COE team within the organization.
The enterprise application contains all the rules which are commmon to the complete organization. Also, it maintains all the standards related to the complete organization. And other application will be simply built on it and they can utilize all the rule within the enterprise layer.
Before you start with this blog, please check my previous blog on Create a new application in Pega.
In the last blog, we have seen how to create a new application in Pega and now, we are going to configure the enterprise application.
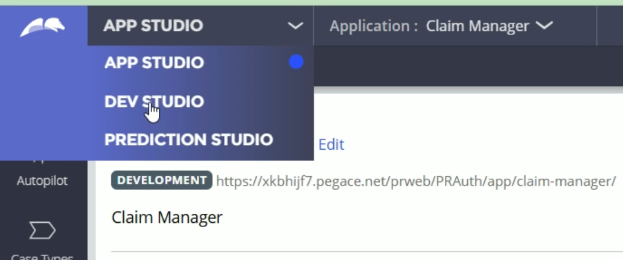
First of all, you need to jump on to the Dev Studio.
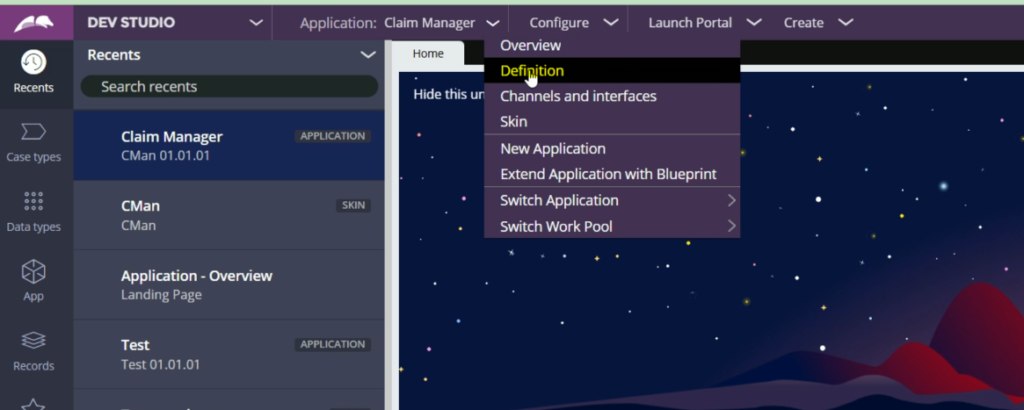
Now, open the Application Definition.
Here, as you can see, the application is built on Constellation. Also, this application includes the Rulesets from Enterprise layer as well.
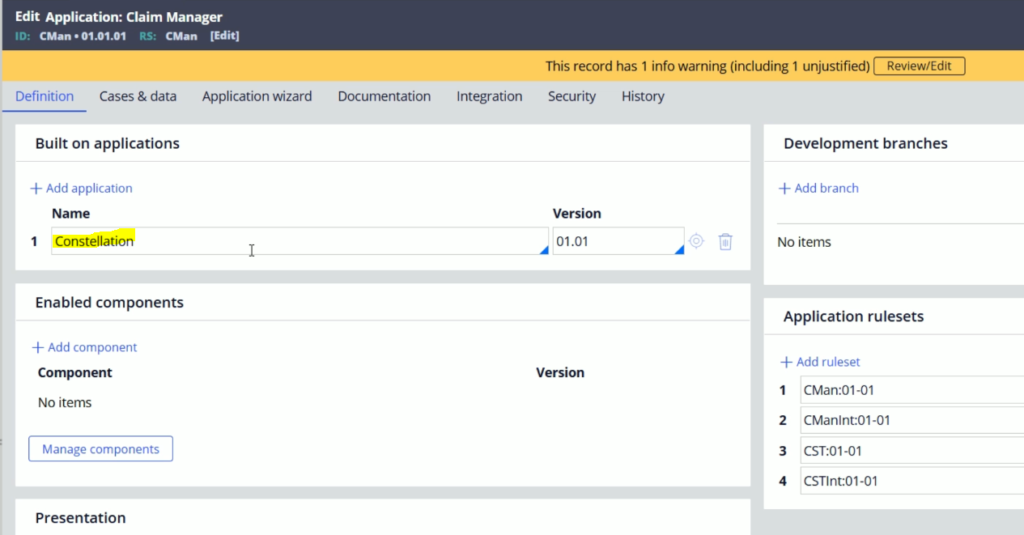
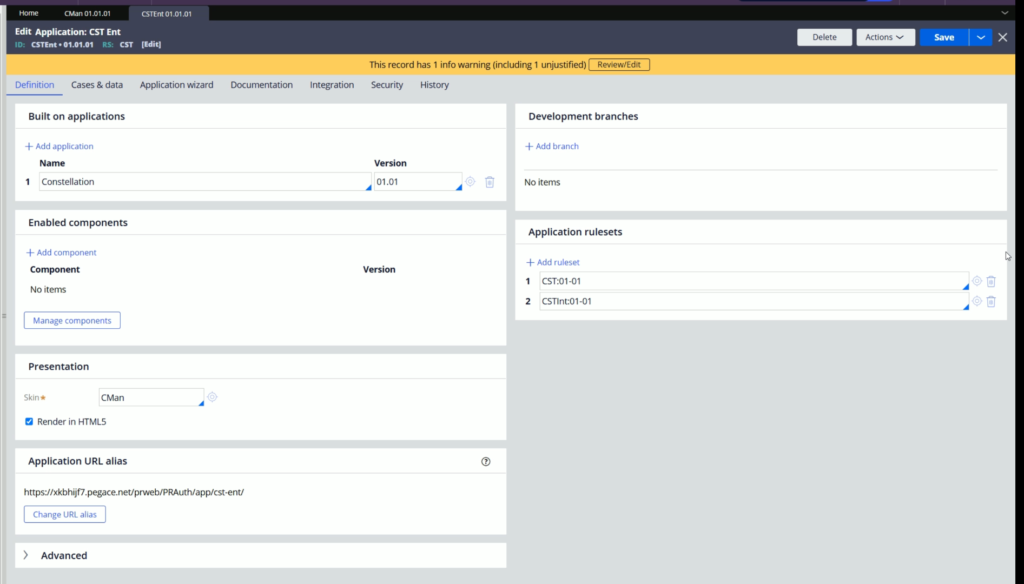
To create Enterprise application, click Save As. Here we are going to create a copy of this application and we will make the necessary changes.

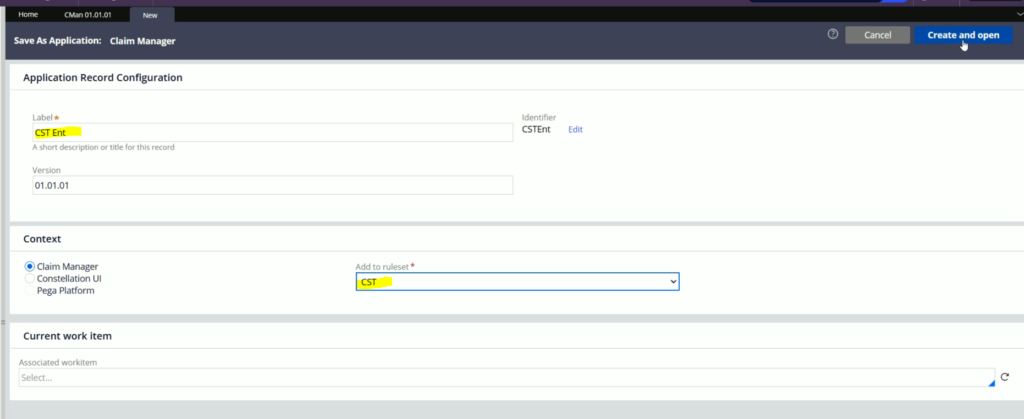
So, here on this create a new application screen, update the Application label to “CST Ent” & select the respective Ruleset, which is CST.
Whenever you create rule in Pega, its very important to select the correct Ruleset.
No click Create and open.
You will get a few errors while creating this new application and we need to do some changes to it.
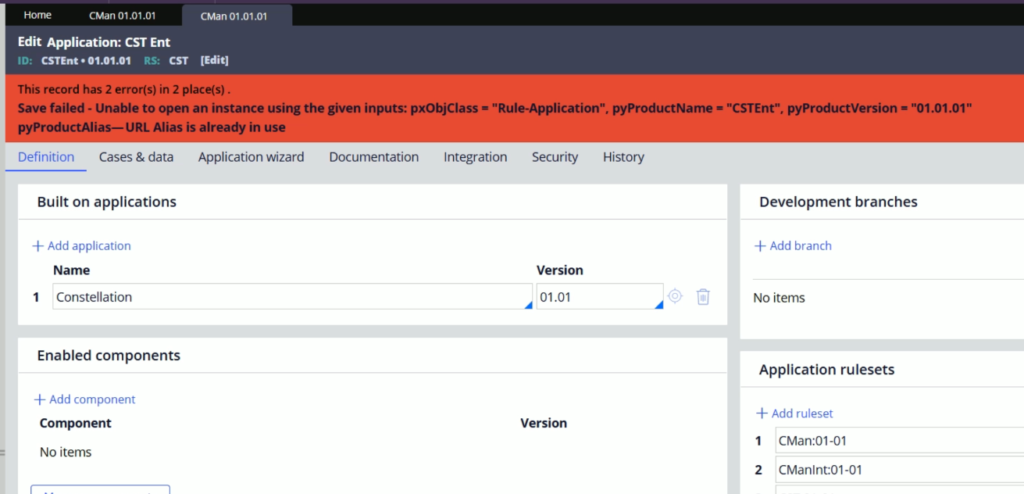
As per this error, we need to change the Application URL.
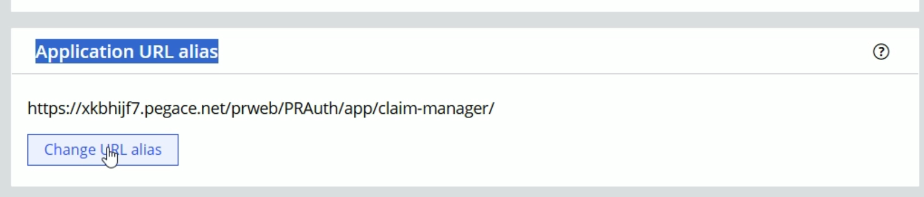
So lets click on Change URL alias
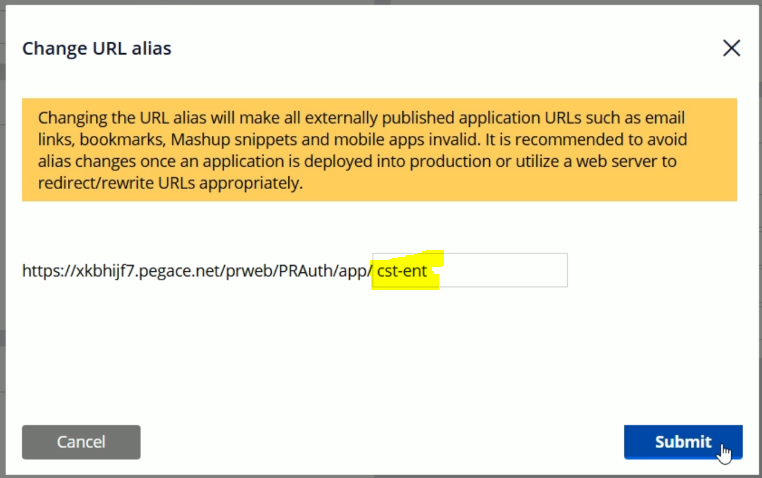
So, instead of claim-manager, enter cst-ent, which will be the part of the new url. And click Submit
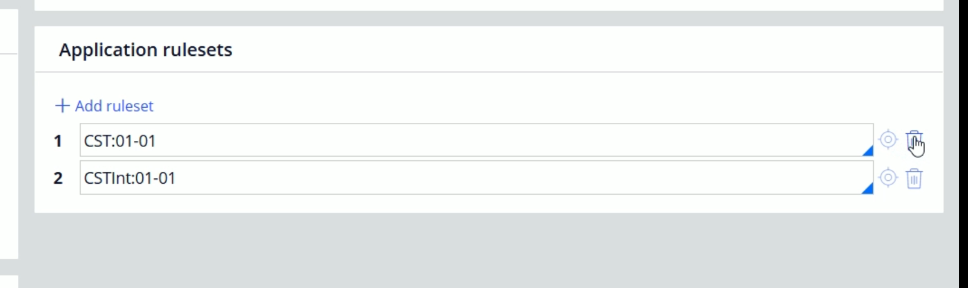
And the next change we are going to do is, we will remove the Rulesets which are not part of enterprise layer.
So here, we will remove CMan & CManInt and we will keep CST & CSTInt Rulesets.
Now, click Save. And it should get saved correctly.
Now, we are going to make one more change.
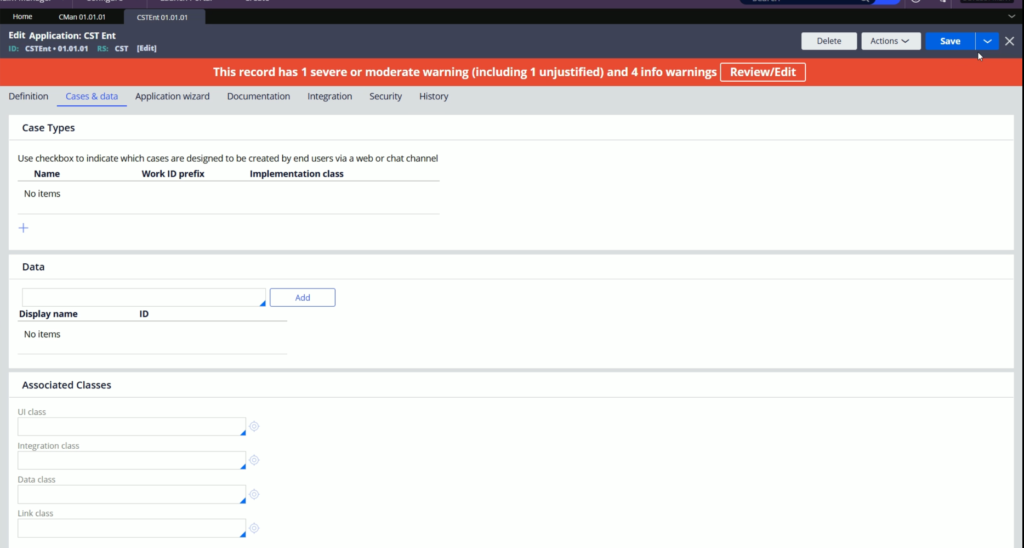
For this, go to Case & data tab. And clear all the Associated classes & click Save. As the classes are related to Claim Manager application, its not required here.
At the moment, please ignore the warnings at the top.
Here were are done with the Enterprise application creation. Now its time to configure in the Claim Manager application.
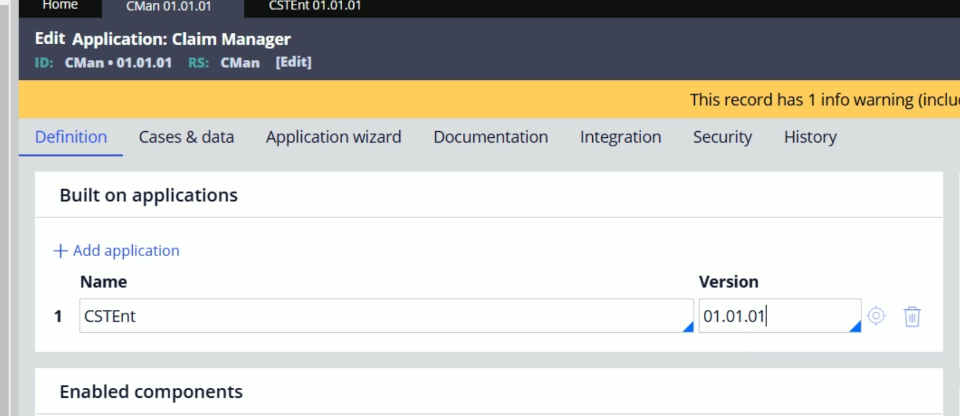
Lets go back to the first tab i.e. Claim Manager application rule.
From Build on application, delete Constellation and instead of that, select CSTEnt. Also, make sure to select the respective version.
You can hit the down arrow to see the valid sugestions.
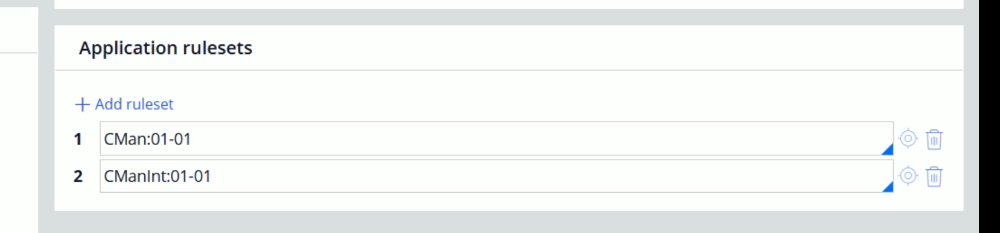
Now, the next step to remove the Ent app related Rulesets i.e. CST & CSTInt. Lets remove them and click Save.
So, this makes our applications ready
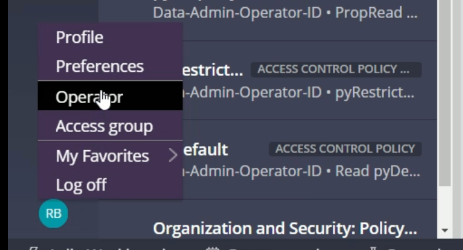
Now, its time to open the Operator, For this click Operator option as shown below.
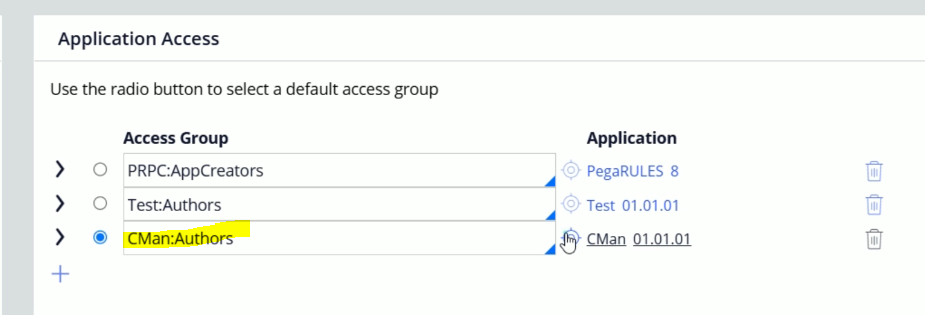
Here, observe this thing. When we created the Claim Manager application, it created this access group – CMan:Authors for us. This access group points to Claim Manager application
Now, with help of this, we are going to create a separate Access group which points to the Enterprise application.
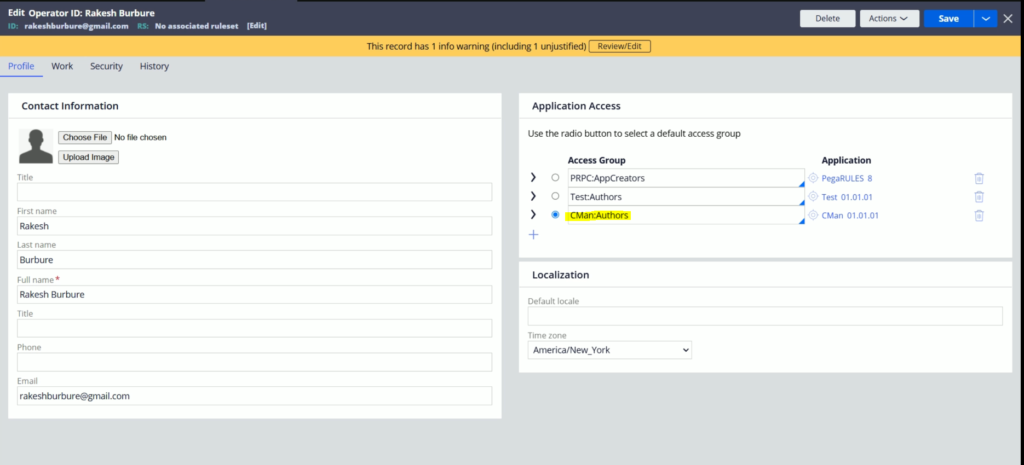
Now, lets open this CMan:Authors access group.
Now we need to Save ass this access group
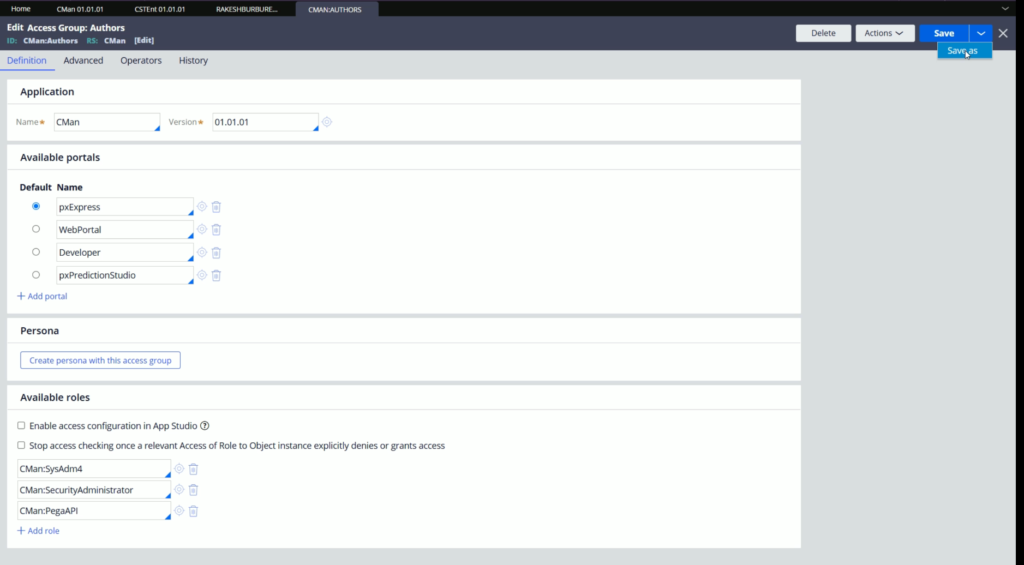
Lets update description & Access group name like below.
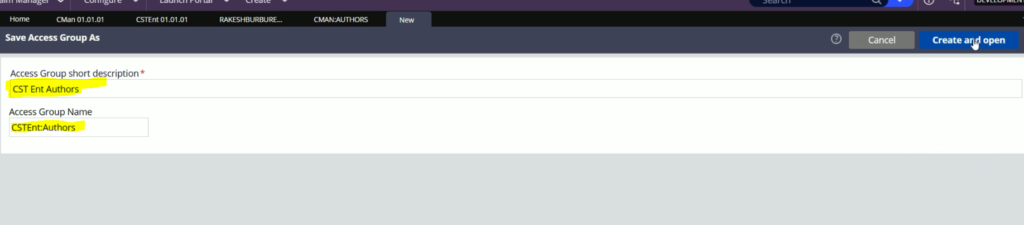
And click Create and open

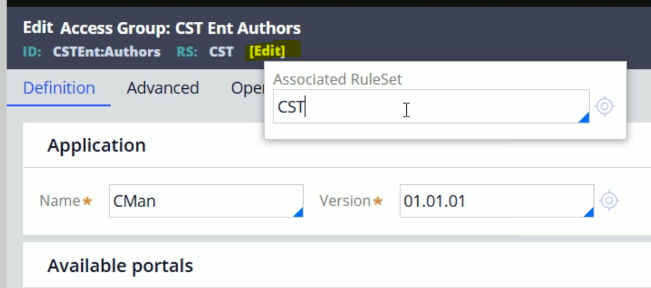
So, here we got a copy for CMan:Authors access group. Now, we need to make some changes to it according to the Enterprise application.
Lest first update the Ruleset. It should point to CST. Lets click Edit and select CST like below
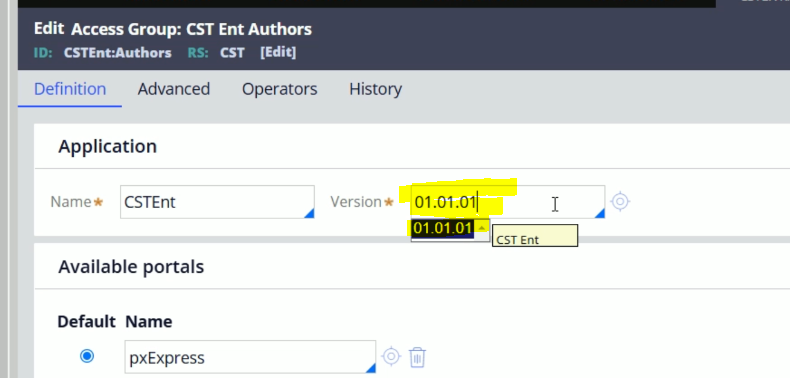
Now update the Application to CSTEnt.
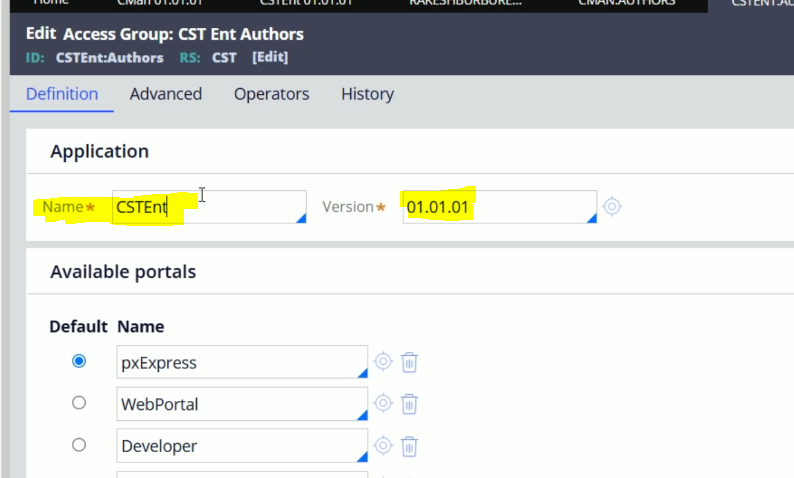
And make sure to select the correct version from the available ones.
Now, click Save.
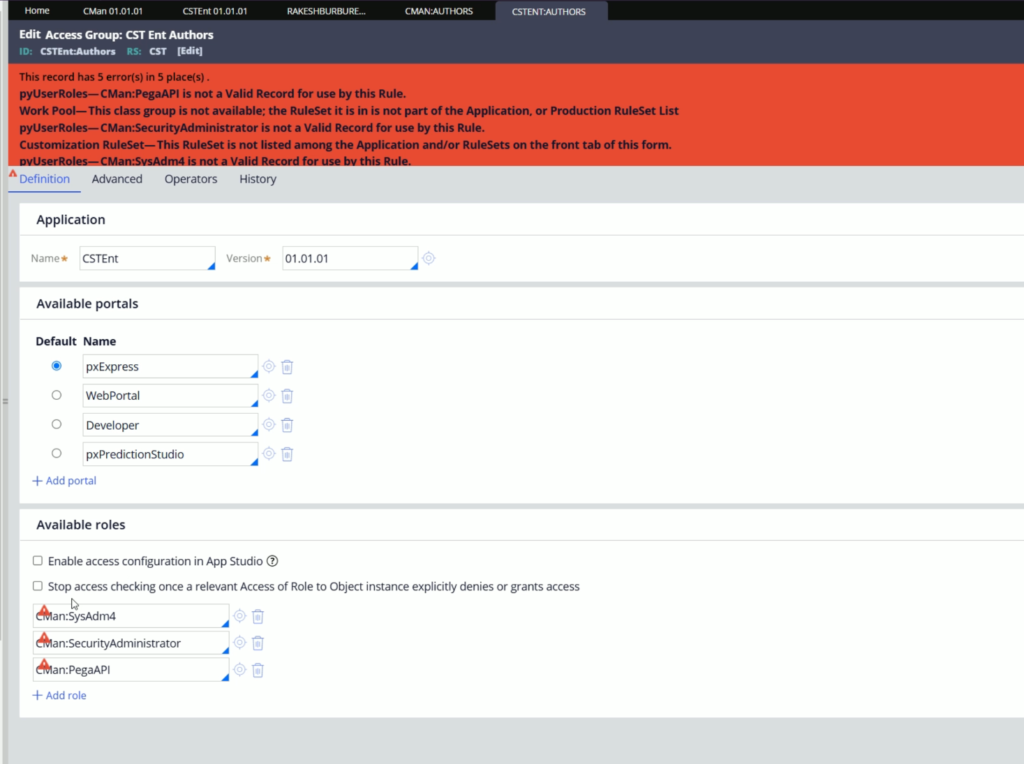
Here, you will observe it will give a lot of errors.
The reason is, Roles present here are applicatble for CMan:Authors access group, and not to the CSTEnt:Authors.
Now, just like these three roles available for Claim Manager application, we need to create similar Roles manually.
For now, lets open CMan:SysAdm4 & click Save as
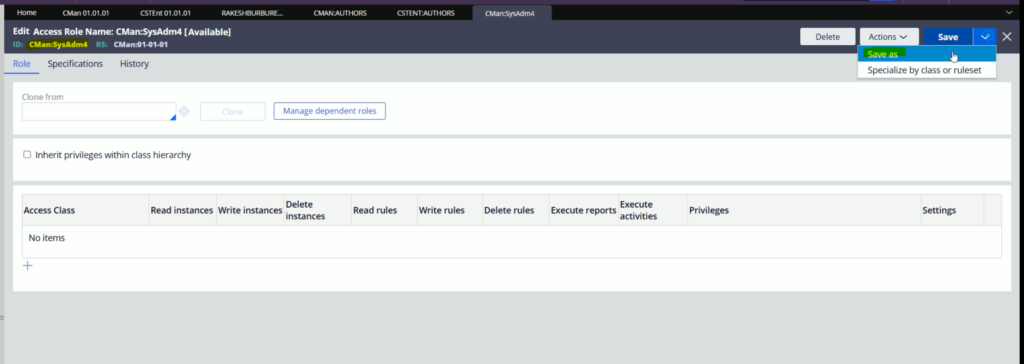
Now, in this form, provide the correct name to this role. Apart from Role, make sure you enter correct Identifier
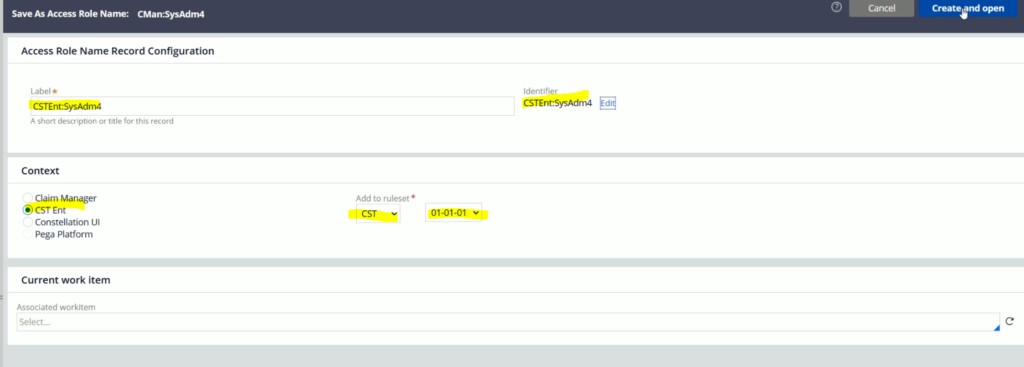
Now, click Create and open.
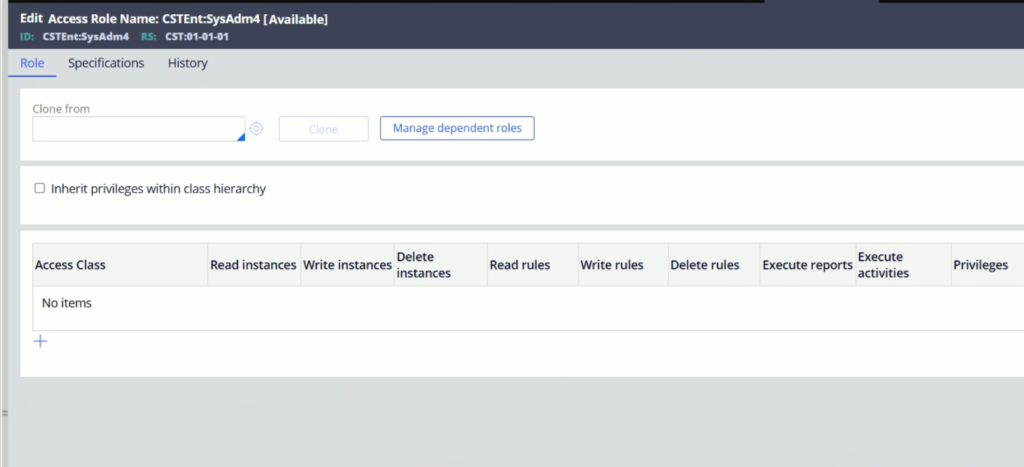
So now, the CSTEnt:SysAdm4access group is ready.
Like this, Save as other Roles as well.
Now, its time to go back the CSTEnt:Authors Access group.
And instead of the old Roles, select the new one which we created.
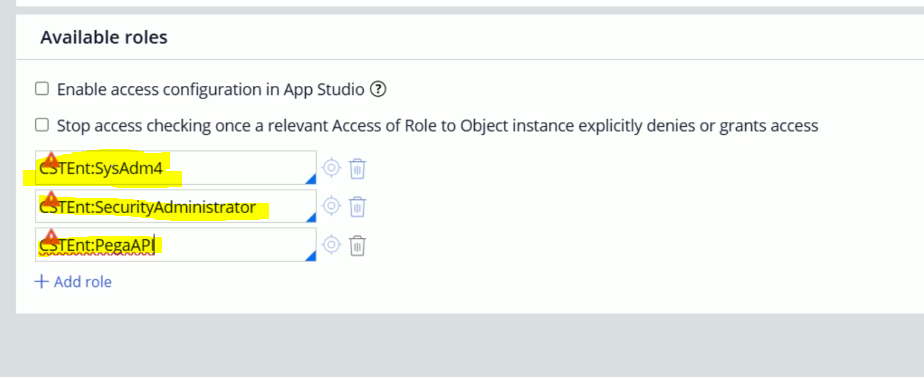
Now, lets click Save.
Now, we are eft with 2 more errors.

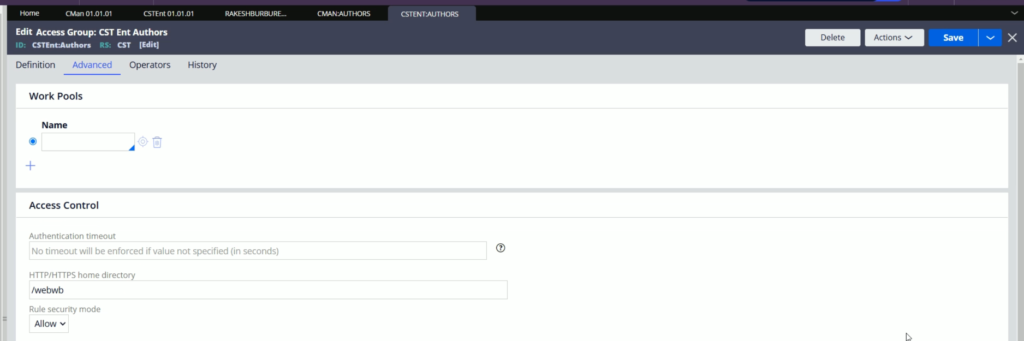
For this, lets go to Advanced Tab.
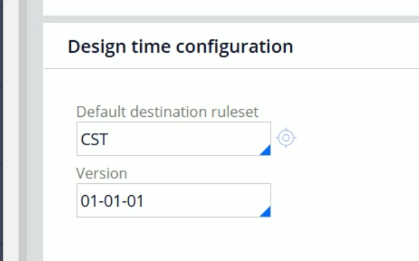
Here, as you can the default destination ruleset is incorrect
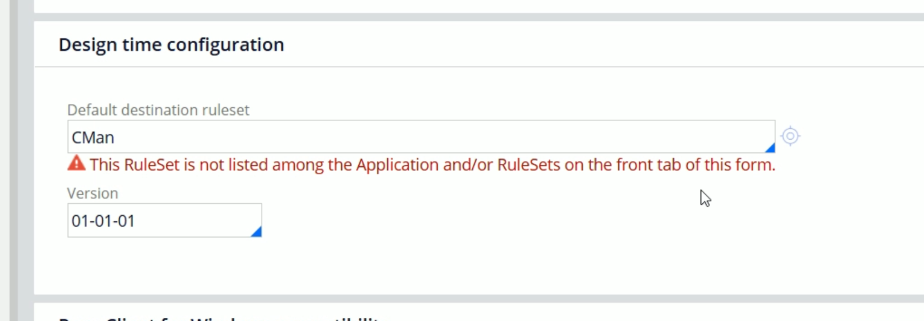
Lets select CST ruleset.
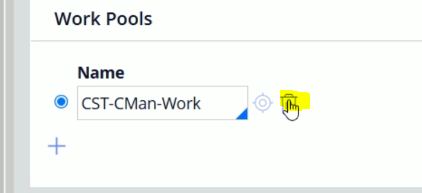
Now, the last remaining error is related to Class group, which is not a part of Enterprise application.
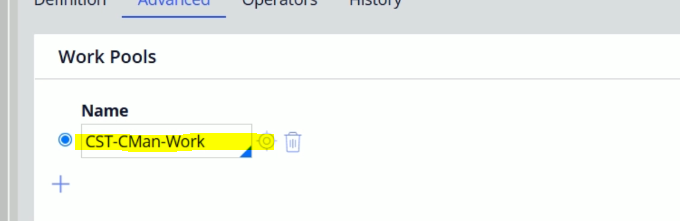
Lets delete this.
And click Save.
The Access group has been created successfully.
Now we can share the access group with the COE team members.
Now, lets go back to the Operator Id
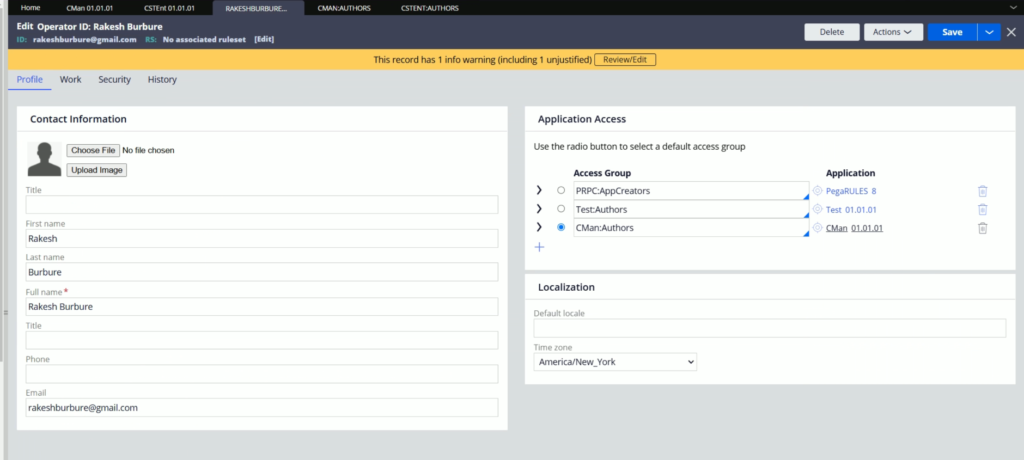
Lets, click on the + icon for adding the new Access group.
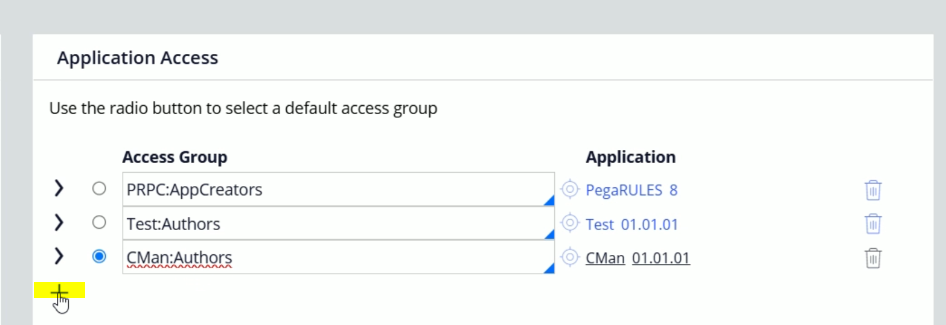
And select the newly created access group here.

And click Save.
After saving the Operator, if we go to the Application menu > Switch Application > Here we should the Enterprise application.
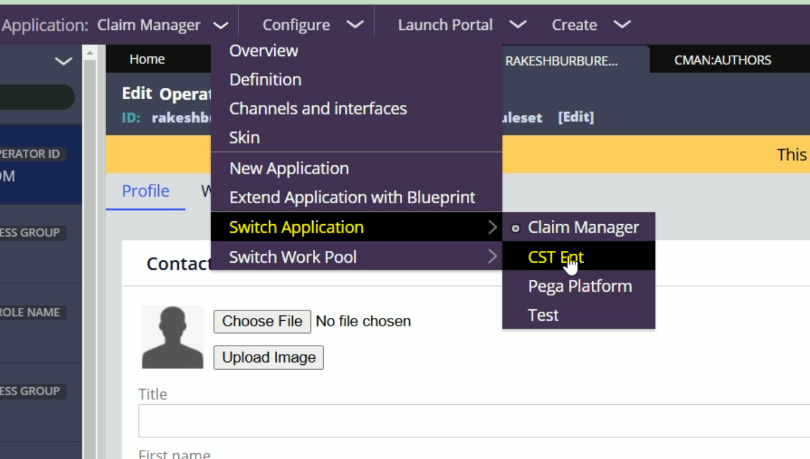
After clicking that, we will switch to the CST Ent enterprise application.
