Hi All,
Creating a new application is the starting point of learning. But before you start creating a new application, you need to have clear idea of your application.
You need to make sure that you have answers for the below questions, and you are good to go.
- What is the purpose of the application and what will be its name?
- Is your application going to built on any other application or framework?
- Is your application going to be used for different countries/departments/teams with specialization?
- Are you going to include Division/Unit in the class layers? If yes, what is it?
- What is the organization name for which you are going to create the application?
In the previous blog – Getting Started with Pega we have already created an application. There, we had started with the initializing a new Community Edition. If you are new to community edition, then please read that blog first and you may come back here later.
Scenario:
Now, lets talk about the business requirement for which we are going to create a new application.
Lets Say, CST INS is an Insurance company which sells the Insurance plans. The portal which sells the insurnace is all set. And now the company wants an application for end users where they can raise the the claim requests and get the update on it.
CST also, wants their employees to review the claim and take the appropriate action on it.
So for all these requirements, we are going to create one application in Pega.
This is the Admin Studio, to which you will be by default logged in. If you have logged in with Administrator account, make you create your own account and login with it.

To create a new application, go to Application menu > New Application.
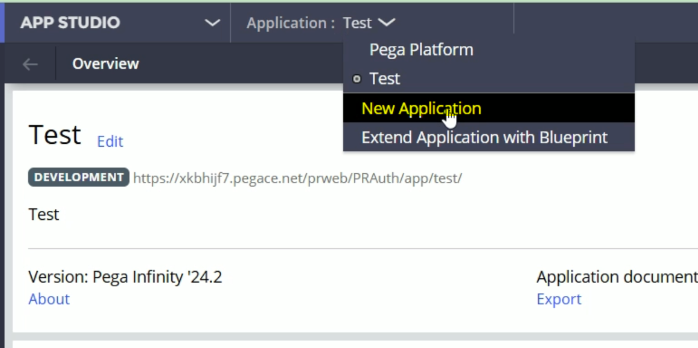
You will get these options to create a new application.
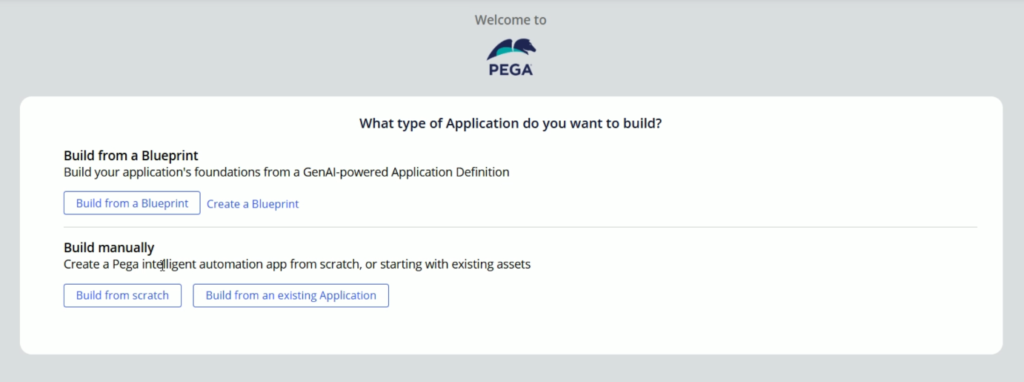
The first section talks about Build from a Blueprint. I have already create a blog on this and please check this blog Pega GenAI Blueprint for more details.
Here, we are going to follow the Build from scratch option.
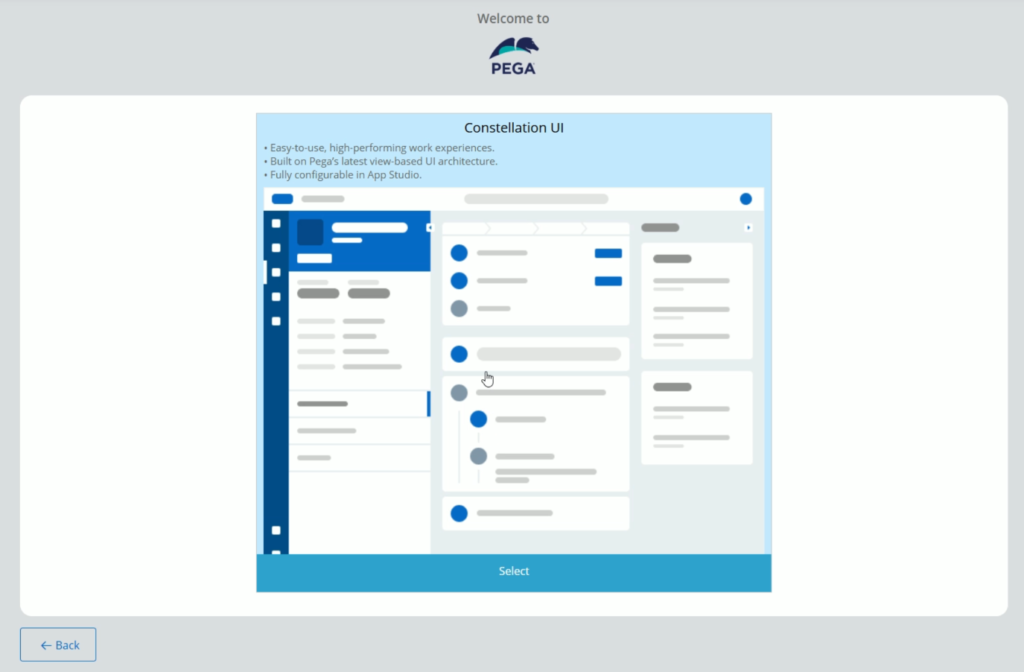
Here you will find only one option and that is Constellation UI.
If you want to create a new application based on Traditional UI, then you need to go back to previous menu and follow Build from an existing Application menu.
Now lets click Selection for Constellation UI
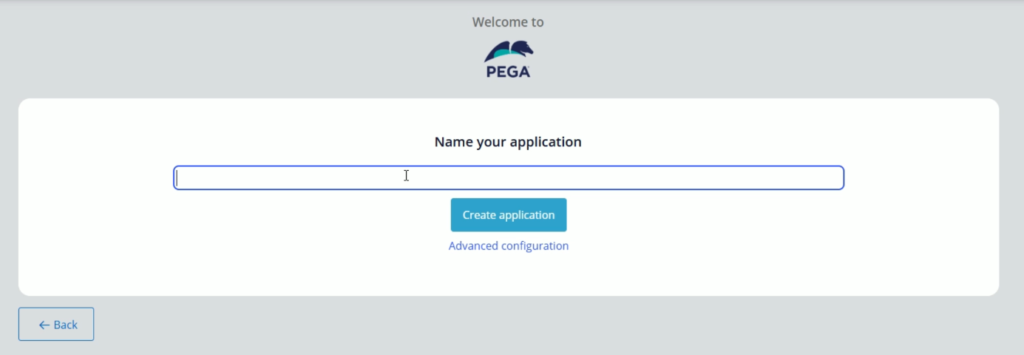
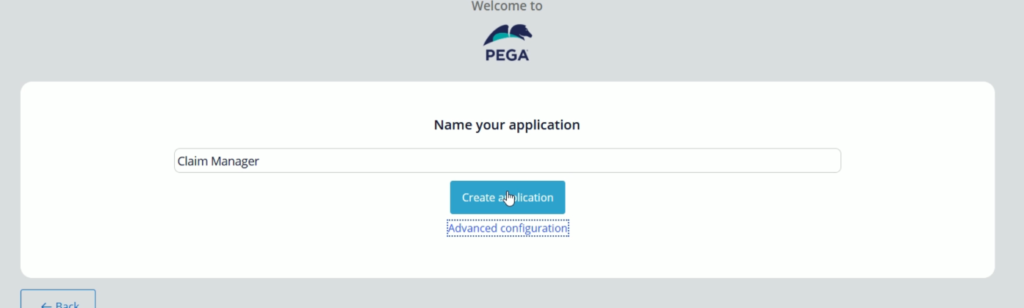
In the next step, it will ask you to enter the Application Name. Enter the application name, lets say “Claim Manager” & click Advanced configuration

You will land on the Advanced configuration screen.
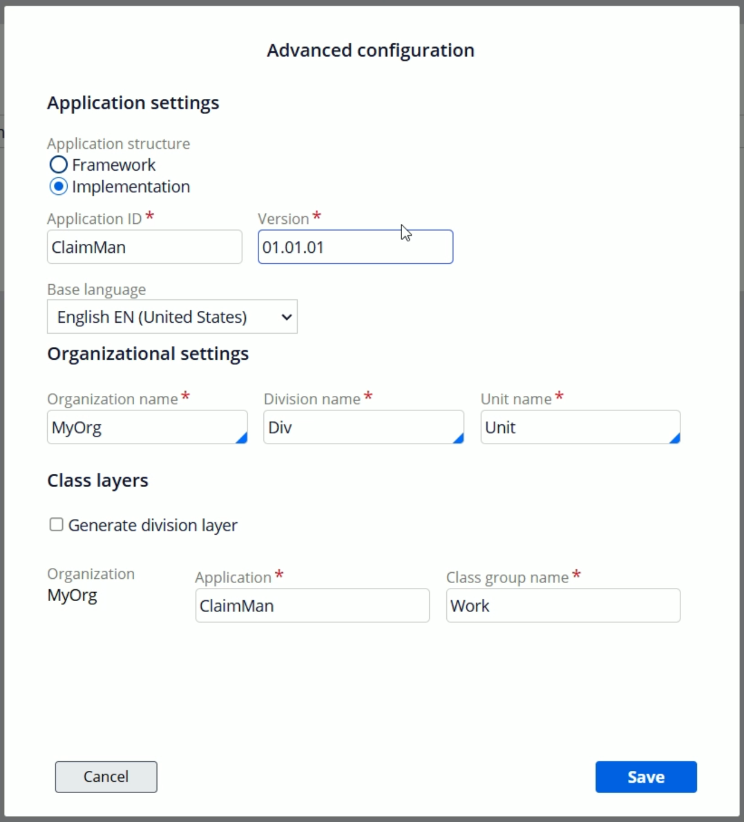
Here, you are going to fill the details for your application.
- Application Structure: Select Implementation here.
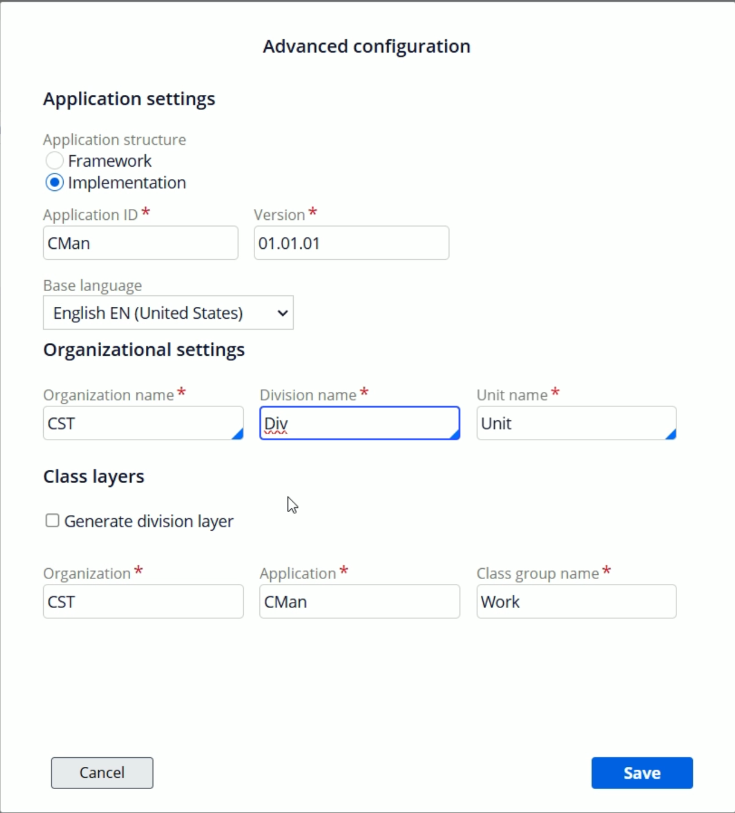
- 2. Application ID: You may shorten the Application ID and give a meaningful shortcut
- Base Language: You can select language as per your requirement or keep it as it is.
- Organization Name: Enter your organization name. You can give short form as well.
- Division name: If you are going to have different application versions for different Divisions, you can provide the respective name here. Otherwise, keep it as it is.
- Unit name: If you have selected Division, and your division is going to have multiple units, then enter the unit name here. Otherwise, keep it as it is.
So, here I have updated the form as per the requirement.
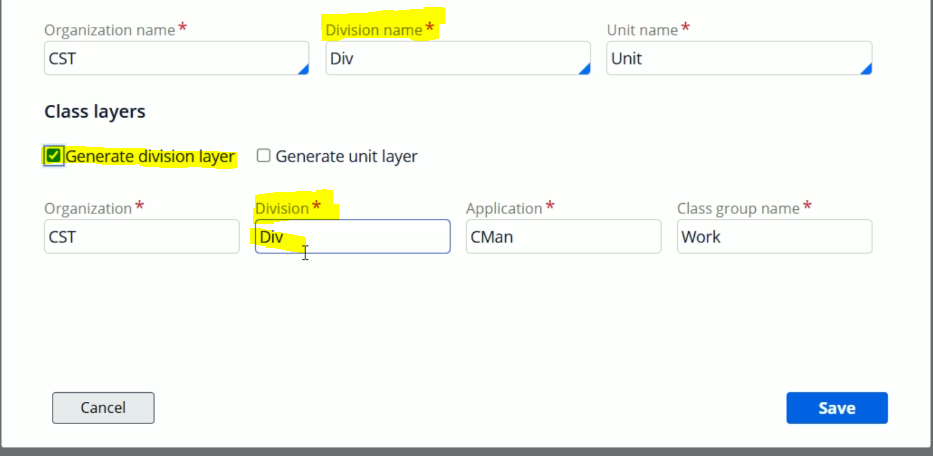
And now, its time to decide the Class Layers (Enterprise Class Structure)
If you observe, the class layers has Organization, Application & Class group name.
Once you click Generate division layer checkbox, the division layer will get added to the class layers. Also, you will get once more check box to select the Unit layer
Now, lets go and select the Generate unit layer checkbox
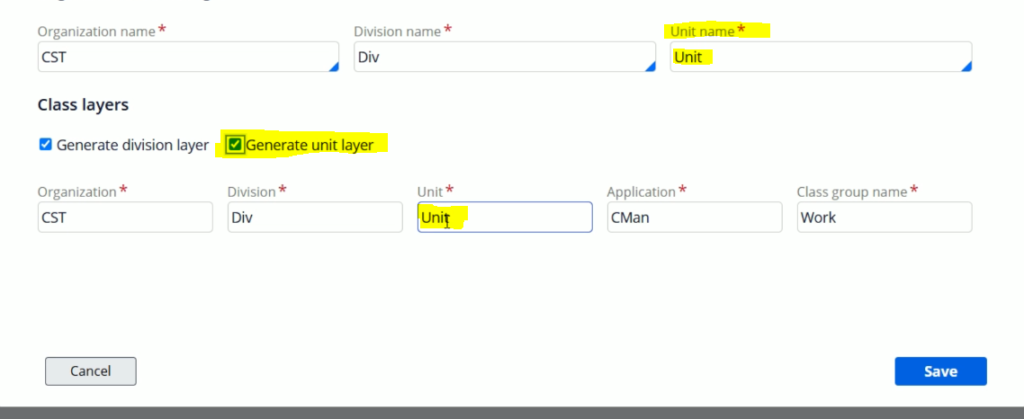
And now, you will observe, unit layer has also been added to the class layer.
The class layers you see here will get created once we create a new application.
Now, unselect the Division & Unit layers, We are going without Division & Layers.
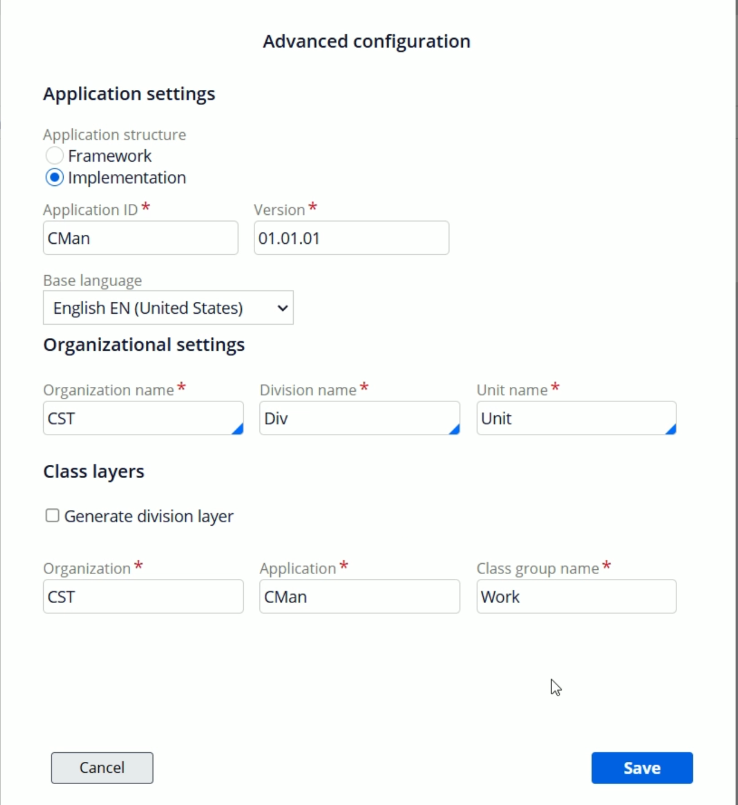
Lets click Save.
Now, we are ready to create application. Lets click Create application
It will take some time and once the application creation gets finished, you will get the confirmation screen like below.
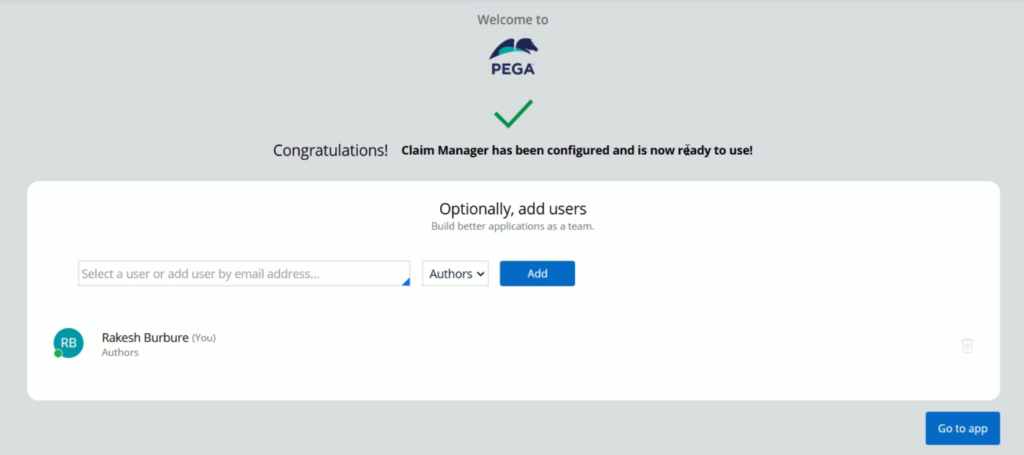
Lets click Go to app, and you will land on the App Studio for this newly created application.
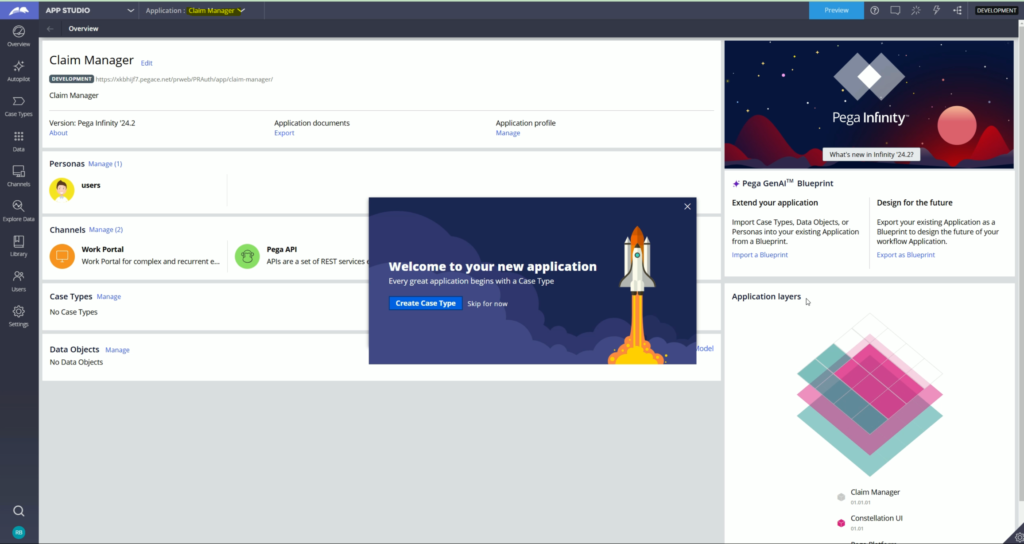
It will give you a popup with option to create a new case type. We are going to have a separate blog for case types, so we will discuss the Case type topic later in a separate blog.
Now , lets click Skip for now. And the pop up will get closed.

Now, we are going to visit some important rules which got created when we created this application. And for this, lets go to Dev Studio.
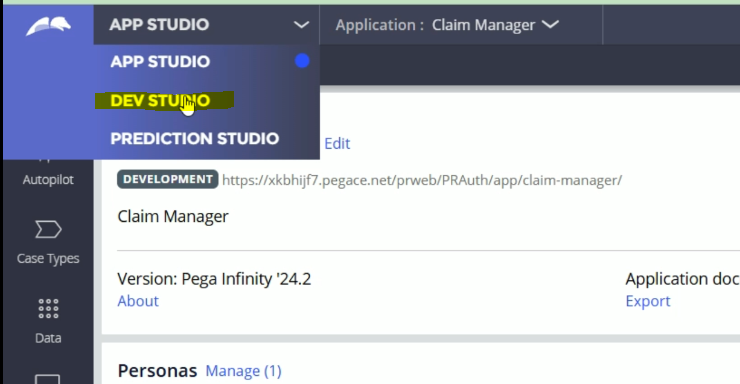
Once you land on the Dev Studio, open the Application rule. For you, you can follow Application menu > Definition
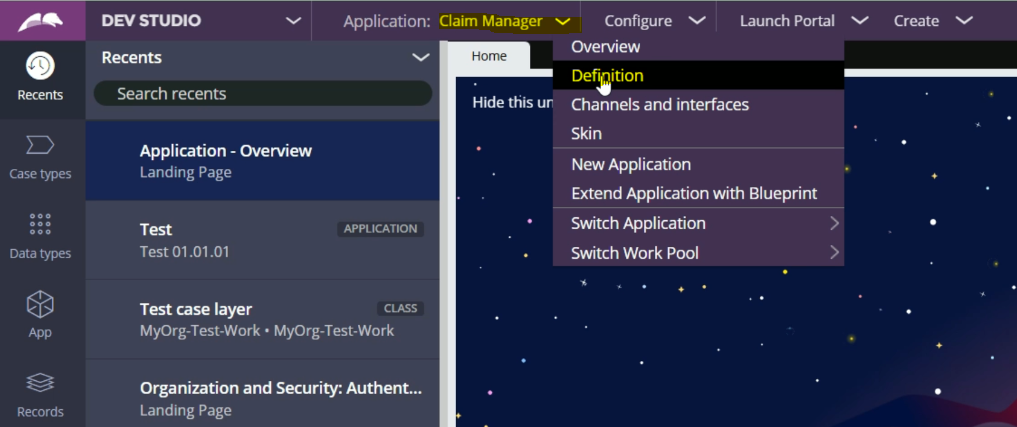
This will open the application rule.
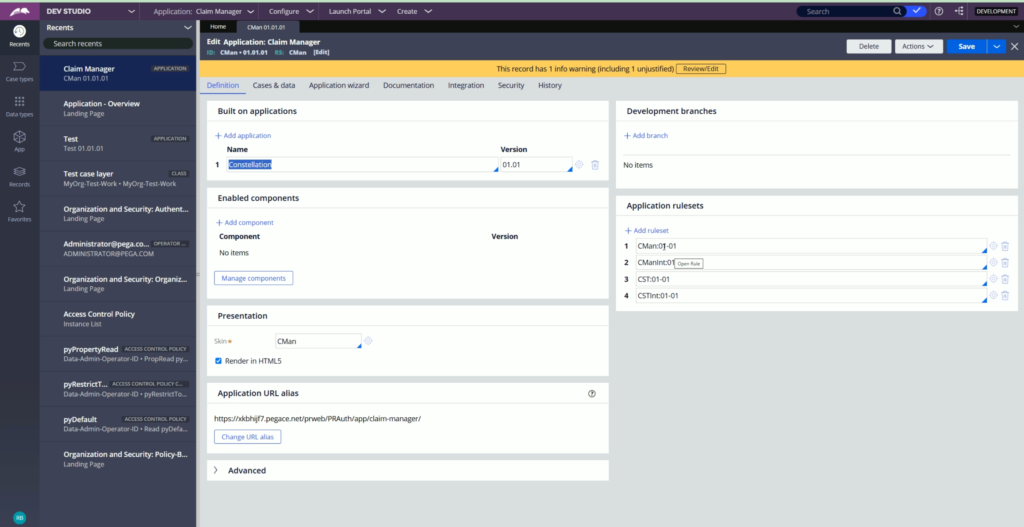
On this screen, you will observe some of the rules which got created like Rulesets, Skin rule, etc. Some of the rules which got created are as below,
- Application Rule
- Rulesets for each layer
- Skin rule
- Classes as per the given class layer
- DB table rule for work class
- Access Group & other security related rules.
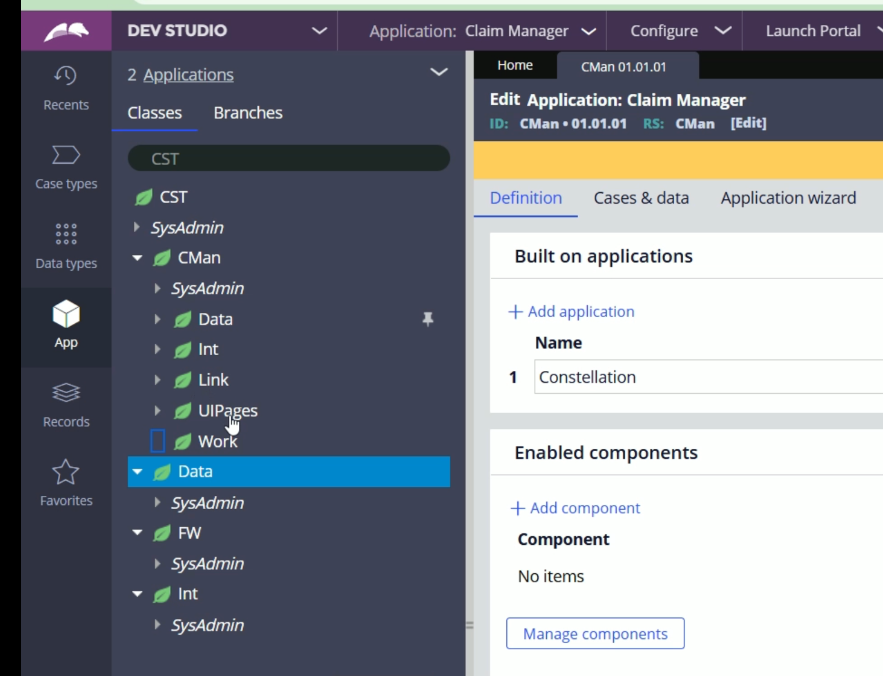
If you click App from the left side menu, it will open the App explorer where you will find the classes which got created. You can start expanding the classes from CST class and observe the child classes within it.
Now lets observe the changes happened in the Operator ID. for this from the bottom left side, click on the operator icon and click Operator
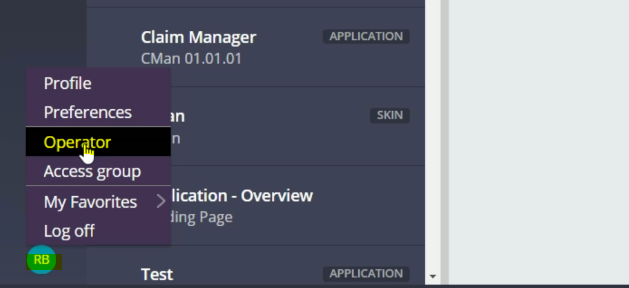
It will open the operator id and you will find a new Access group has been added to the list.
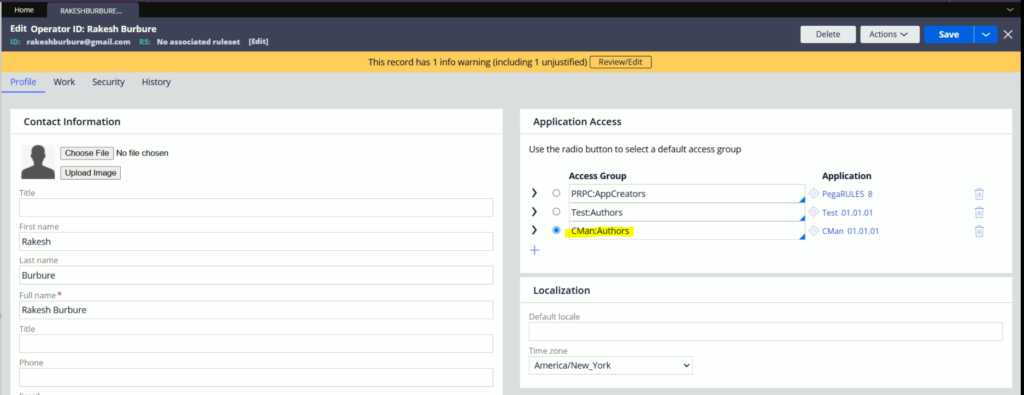
Lets open this access group
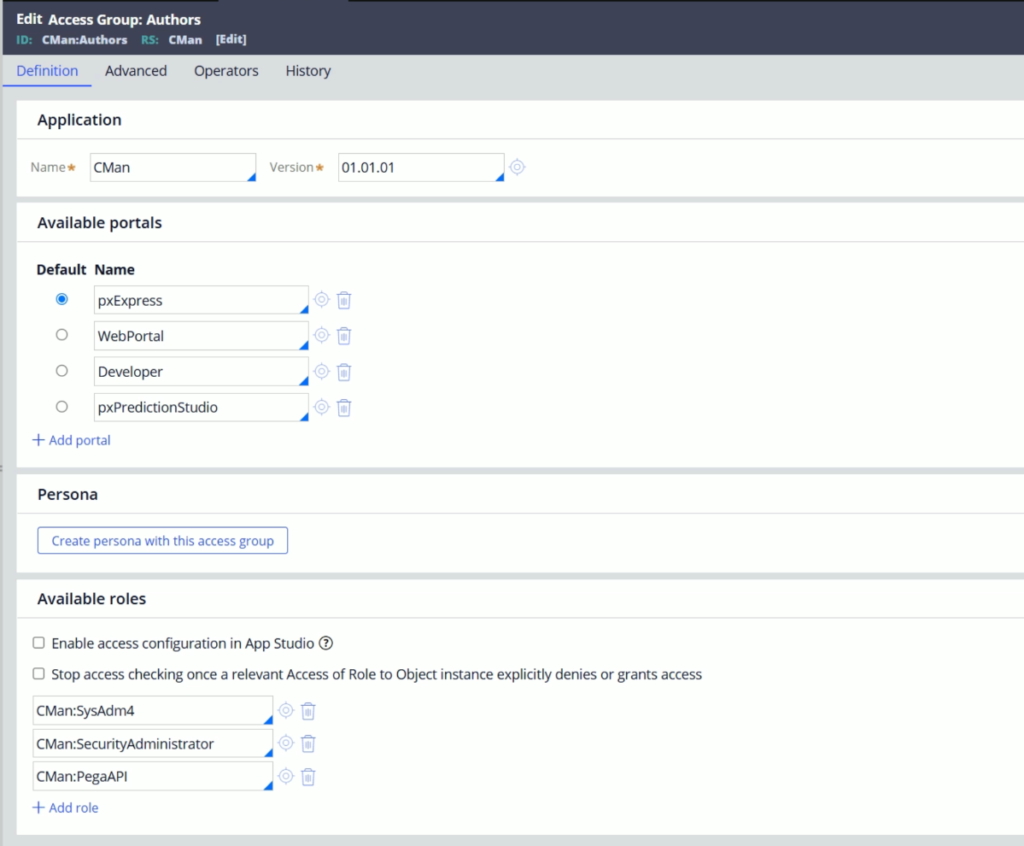
- This access group points to Client Manager application.
- It has 4 available portals and the default one is pxExpress, which is App Studio
- Apart from this this access group has 3 newly created roles.
Let’s end this blog here.
In the next blog, we will talk about the Enterprise application. We will observe how are configure the Enterprise application in a few simple steps.
So, please make sure keep watching CodeStreamTech site and share it with your friends who are learning Pega.
Thanks.